Engine Oil Pressure, Check
TAD752GE, TAD753GE, TAD754GE
Tools:
1678297 Spacer
9990124 Nipple
9996398 Manometer
9996666 Nipple
1 Check the oil pressure at engine oil operating temperature, 110-120 °C (230-248 °F).
2 Measure the lubricating oil pressure on the Volvo engine fuel pump side as illustrated, using a pressure gauge, nipple and spacer.
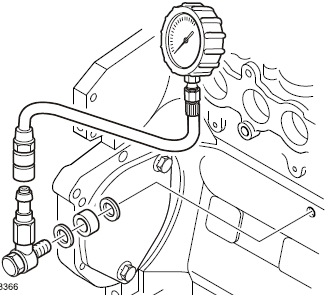
3 Min oil pressure in hot conditions and at idle: Model: 90 kPa (0.9 bar, 13.1 psi)
4 At rated engine speed: 300-500 kPa (43.5-72.5 psi)
5 Automatic stop, at pressure less than:
• 1500 rpm 170 kPa (24.7 psi)
• 1800 rpm 200 kPa (29.0 psi)
6 Start the engine and check the oil pressure. If the oil pressure measurement shows that the pressure is below the pecified minimum value, continue fault tracing by checking the oil filters. If the oil pressure measurement using an external pressure sensor shows that the pressure is within tolerances, but the regular engine pressure sensor does not, replace the regular pressure sensor.
Click to find how to change lubricating oil and oil filter.
Oil pump housing, change
TAD752GE, TAD753GE, TAD754GE
Tools:
88800014 Rotation tool
Removal
1 Remove the radiator assembly; refer to 26-1, Radiator Assembly (Complete Unit), Change.
2 Remove the fan; refer to 26-3, Fan, change.
3 Remove the fuel pump and coolant pump drive belt; refer to Drive Belt, Change page 204.
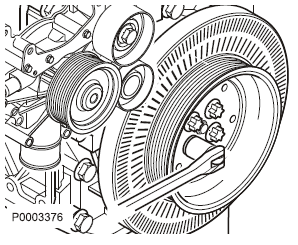
4 Remove the plug from the flywheel. Fit 88800014 Rotation tool. Refer to Main bearing, Change page 75.
5 Unbolt the vibration damper and scrap the bolts.
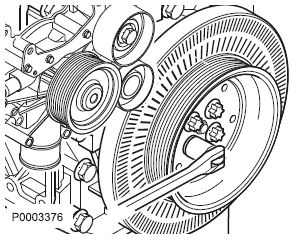
6 Remove the vibration damper.
7 Drain the engine oil.
8 Remove the oil sump; refer to Main bearing, Change page 75.
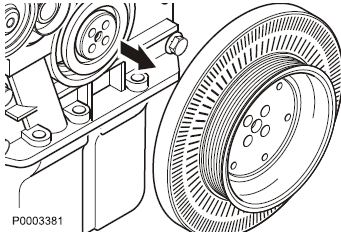
9 Remove oil pump housing (front cover).
Installation
10 Clean the engine block from gasket remnants. Check that the guide pin is fitted.
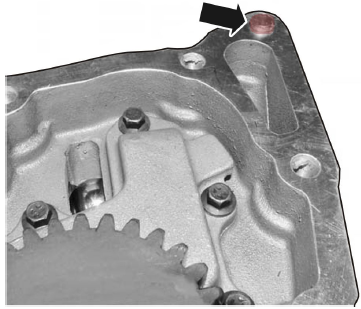
11 Apply sealing compound (part # 21076473).
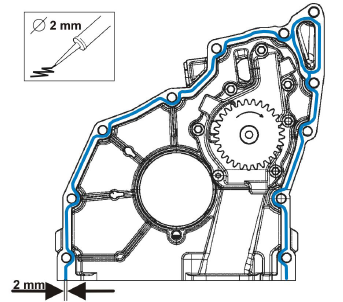
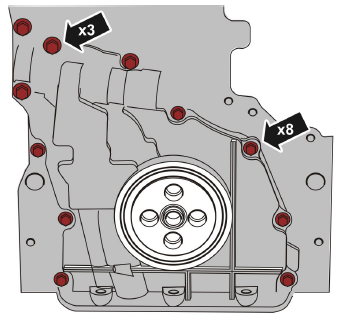
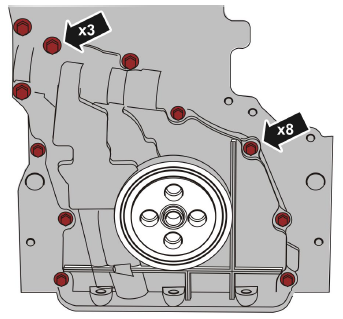
12 Install a new oil pump housing; align it with the guide sleeve. Tighten the bolts. Tightening torque: 30 Nm (22.1 lbf. ft.) x3 M8 x 70 mm x8 M8 x 35 mm
13 Lubricate and install the crankshaft seal; refer to Crankshaft Seal, Change (front) page 63.
14 Install the oil sump; refer to Main bearing, Change page 75.
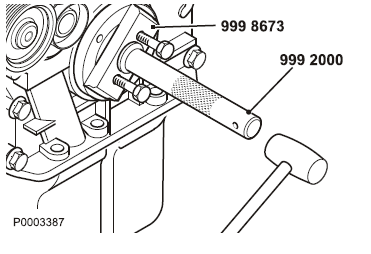
NOTICE! The vibration damper bolts may not be reused.
15 Fit the belt pulley/vibration damper. Tighten in three steps:
Step 1: 30 Nm (22.1 lbf. ft.)
Step 2: 60° (angle tightening)
Step 3: 60° (angle tightening)
16 Install the drive belt and belt tensioner; refer to Belt Tensioner, Change page 202
17 Install the fan; refer to 26-3, Fan, change.
18 Remove the cranking tool from the flywheel housing and install the cover.
19 Install the radiator assembly; refer to 26-1, Radiator Assembly (Complete Unit), Change.
20 Start the engine and perform a function check.
Oil pump housing, change
TAD550GE, TAD551GE, TAD750GE, TAD751GE
Tools:
9998681 Rotation tool
Removal
1 Remove the radiator assembly; refer to 26-1, Radiator Assembly (Complete Unit), Change.
2 Remove the fan; refer to 26-3, Fan, change.
3 Remove the fuel pump and coolant pump drive belt; refer to Drive Belt, Change page 204.
4 Remove the feed pump; refer to Fuel Feed Pump, Change page 120.
5 Remove the vibration damper.
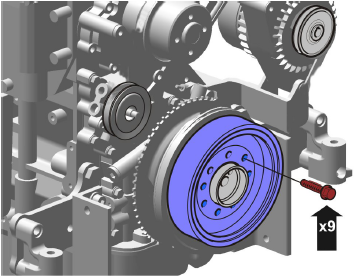
6 Use 9998681 Rotation tool as a counterhold. Refer to Valves, Adjustment page 49.
7 Undo the bolts and scrap them. Remove the adapter (1) and pulley (2).
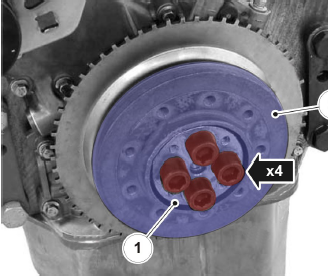
8 Remove the reluctor wheel and pulley.
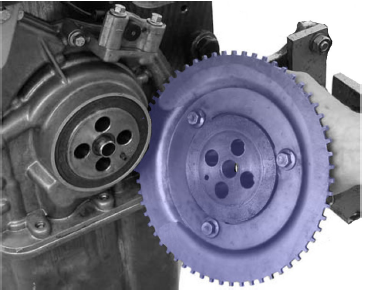
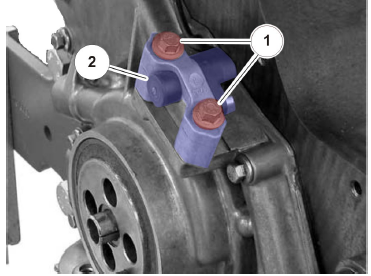
9 Remove the holder (1) and tachometer sensor(2).
10 Drain the engine oil.
11 Remove the oil sump; refer to Main bearing, Change page 75.
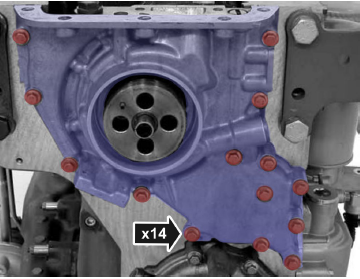
12 Remove oil pump housing (front cover).
Installation
NOTICE! Clean the sealing surfaces.
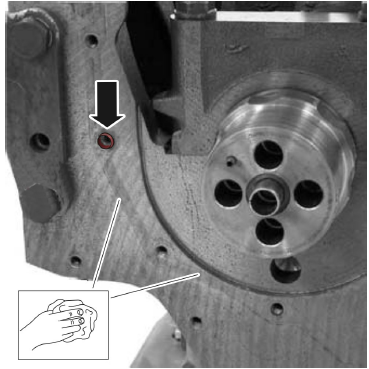
13 Check that the guide pin is fitted.
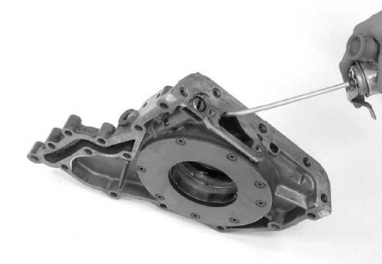
14 Lightly lubricate the oil pump rotors.
15 Fit the gasket onto the engine block.
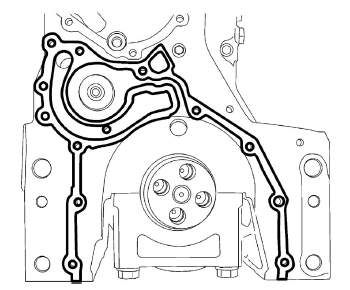
16 Slide the oil pump housing over the recess on the crankshaft. The pump unit rotor only fits in one position.
17 Install the bolts without tightening them.
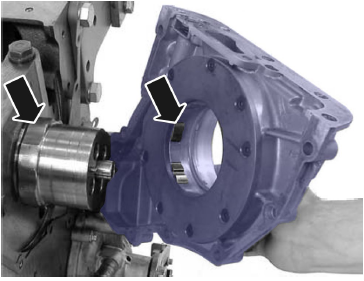
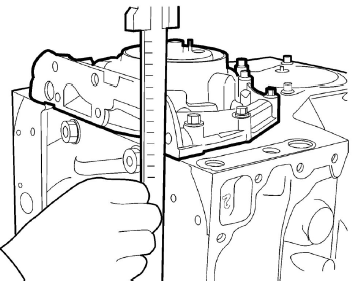
18 Align the oil pump housing with the oil sump sealing surface.
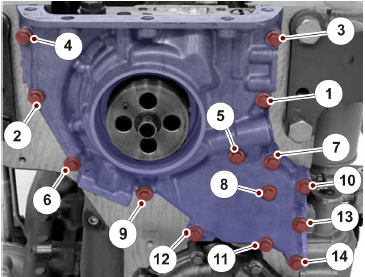
19 Tightening sequence: as illustrated. Tightening torque: 21 Nm (15.5 lbf. ft.)
20 Trim the gasket level with the sealing surface.
21 Install the oil sump; refer to Main bearing, Change page 75.
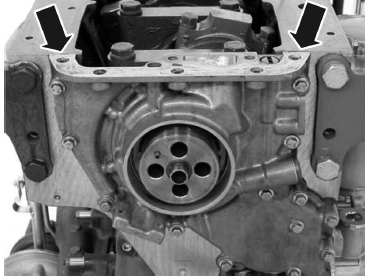
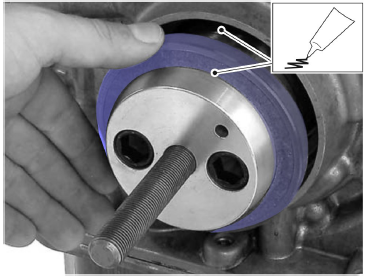
22 Lubricate and install the crankshaft seal; refer to Crankshaft Seal, Change (front) page 63.
23 Run the tachometer sensor cable between the upper front cover and the water pump.
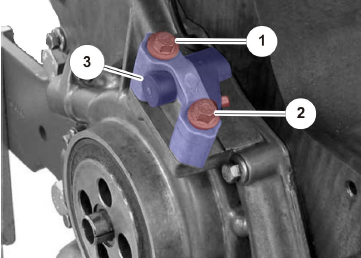
24 Install the sensor (3) and tighten the bolts by hand.
M8 x 45 mm (1).
M8 x 40 mm (2).

25 Install the reluctor wheel and pulley. Note that the guide sleeve and hole must be aligned.
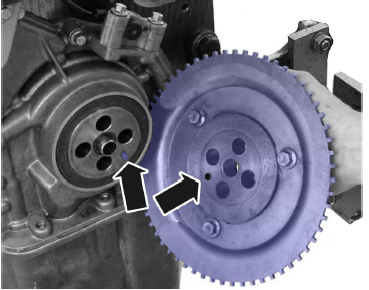
26 Install the pulley (1) and adapter (2).NOTICE! Use new bolts.
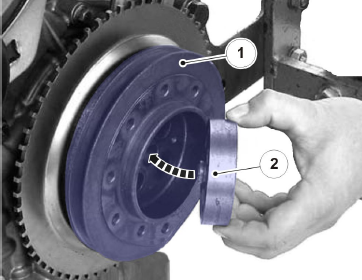
27 Tighten in three steps:
Step 1: 30 Nm (22.1 lbf. ft.)
Step 2: 60° (angle tightening)
Step 3: 60° (angle tightening)
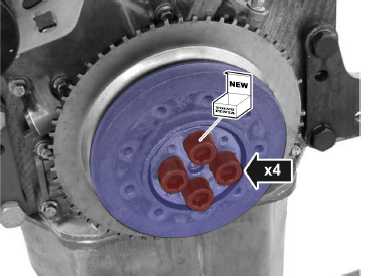
28 Install the vibration damper.
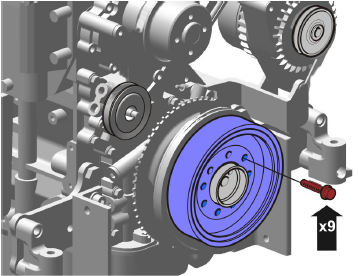
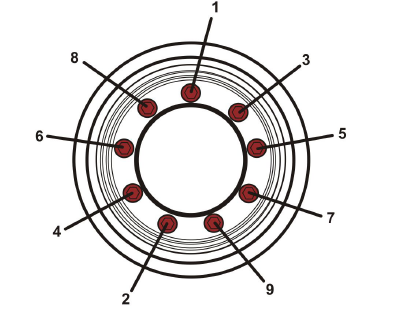
29 Tighten the bolts in sequence, as illustrated. Tightening torque: 70 Nm (51.6 lbf. ft.)
30 Check the gap between the sensor and the reluctor wheel with a feeler gauge. The gap must be: 0.6 mm (± 0.1 mm). Adjust the sensor if the gap is wider or narrower. Refer to Sensors, Adjustment page 60.
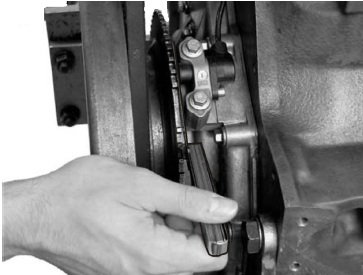
31 Add oil and change the oil filter.
32 Install the feed pump; refer to Fuel Feed Pump,Change page 120.
33 Install the fuel pump and coolant pump drive belt;refer to Drive Belt, Change page 204.
34 Install the fan; refer to 26-3, Fan, change.
35 Install the radiator assembly; refer to 26-1, Radiator Assembly (Complete Unit), Change.
36 Start the engine and perform a function check.
Copyright © Guangxi Dingbo Generator Set Manufacturing Co., Ltd. All Rights Reserved | Sitemap
Update cookies preferences