Volvo Diesel Engine Control System Installation
Connection
General
• The installation must be prepared for well and carried out with the greatest care.
• Secure the connecting cable between the engine and instrument panel with clamps. Bear in mind that connector blocks must be mechanically secured so that they are not exposed to any pulling forces.
• The cables must not be run close by hot engine components or close to any other heat source.
Ensure that the cables are protected from mechanical wear, sharp edges and water splashes. If necessary, the cables can be run through conduits.
• As far as possible, avoid splices in the system wiring.
The cables and any splices must be accessible for inspection and service.
NOTICE! Connectors must be assembled “dry”, they must not be filled with petroleum jelly or similar.
Power supply
NOTICE! The engines are equipped with 2-pole electrical systems. This means that the battery negative cable must be connected to the engine block or the flywheel housing.
The battery positive cable may be run via a main switch to terminal 30 on the starter motor.
The battery negative cable must be connected to the engine block or the flywheel housing, close to the starter motor. Refer to the illustration below.
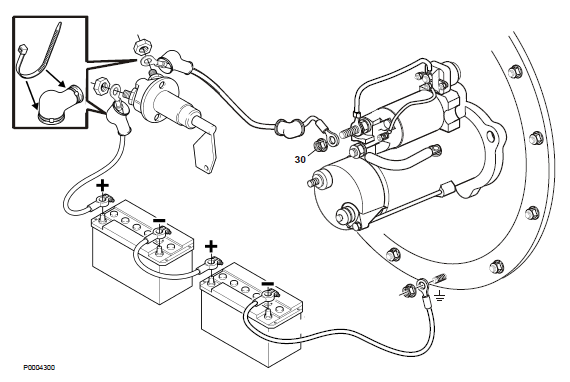
Battery specification
Max. battery 2x220 Ah (series connected), 1150 A CCA EN.
Battery charging
Standard for all engines is that batteries are supplied with power from the alternator
Battery cable cross-sectional area
The total length (L) of the positive and negative cables determines cable cross sectional area (A).
Max L | (m) (ft) | 8 26.2 | 10 32.8 | 13 42.6 |
Min A | (mm2) (in2) | 70 0.11 | 95 0.15 | 120 0.19 |
WARNING!
Due to fire risk, the cable area should never be less than 70 mm2 (0.1 inch2).
Engine control
Refer to System Information page 33 CIU
NO = normally open
NC = normally closed
Start lock (system voltage OFF / ON)
Engine system voltage start current (control unit) is 10
A. Ensure that other components in the installation are dimensioned for this current load.
Start switch
Switch type: closing (NO), spring loaded.
Stop switch
Switch type: closing (NO), spring loaded.
The stop switch is energized during operations via a parameter setting. In this case use a normally closed
(NC) switch.
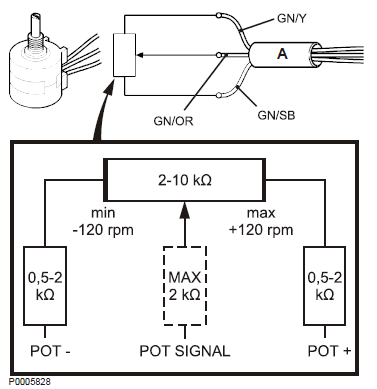
RPM potentiometer
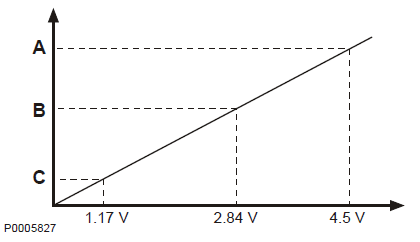
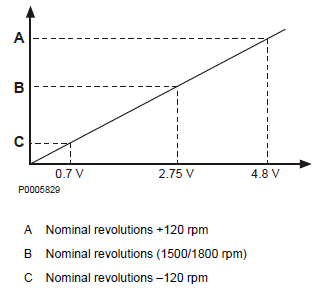
Nominal revolutions minus 120 rpm: 0.3–1.9 V (preset value 1.17 V)
Nominal revolutions plus 120 rpm: 1.9–4.7 V (preset value 4.5 V)
1500/1800 rpm switch
Two-position contact.
This function allows a frequency change from 50 to 60 Hz.
Idle switch
Two-position contact.
Closed contact provides idle rpm.
Droop value switch
Two-position contact.
The switch must be closed to provide rpm droop value.
Primary control switch
Two-position contact.
Contact, pre-heating
Two-position contact.
Instruments
Easy Link Instrument (option)
Refer to the System Information page 33 for the engine concerned.
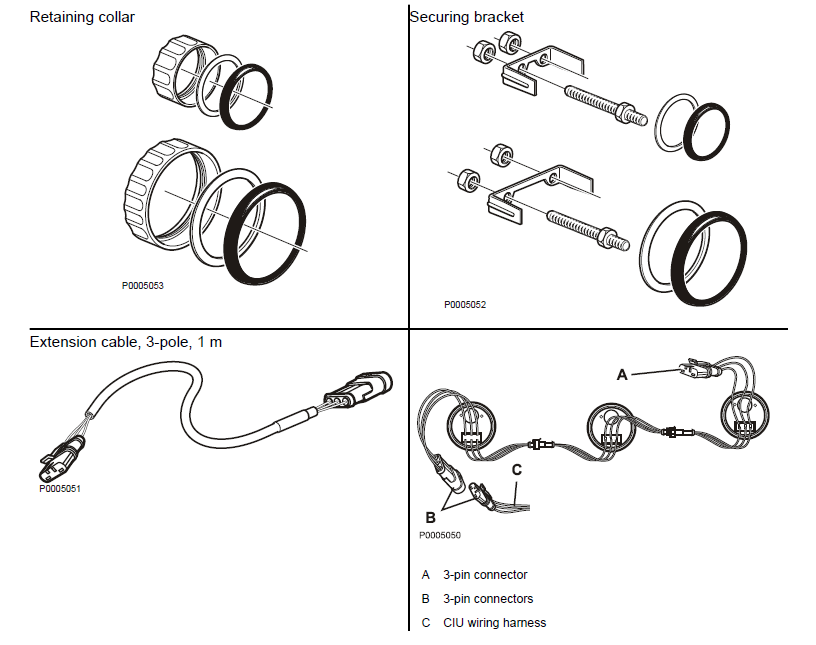
For parallel connection of up to 20 extra VDO instruments.
The instruments will automatically find their own parameter group from the databus. Maximum Easy Link cable length is 3 m.
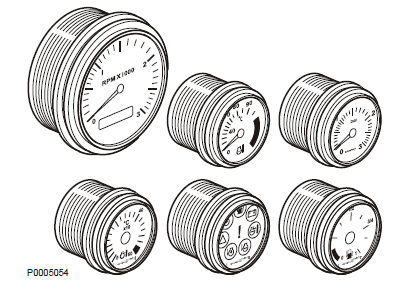
The following instruments are available:
• Tachometer/operating hours
• Coolant temperature
• Oil pressure
• Oil temperature
• Battery voltage
Instrument, analog (option)
Refer to the System Information page 33 for the engine concerned.
Tachometer
Use Volvo Penta standard tachometer, graduations 0–2600 rpm. Setting code 14. Refer to installation instructions.
Oil pressure gauge
Use Volvo Penta oil pressure gauge, graduations 0–10 bar (0–145 psi).
Oil temperature gauge
Use Volvo Penta oil temperature gauge, graduations 40–150 °C (104–302 °F).
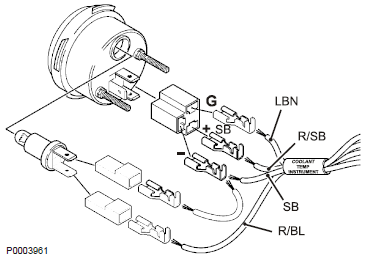
Coolant temperature gauge
Use Volvo Penta oil temperature gauge, graduations 40–150 °C (105–300 °F).
Diagnostics switch Switch type: closing (NO), spring loaded. For reading fault codes, refer to the Calibration and Settings page 72 chapter.
Contact, pre-heater
Switch type: closing (NO), spring loaded. This contact
activates the pre-heating.

Synchronizing Engine Speed
Synchronization/load distribution
The system is adapted for GAC synchronization and load distribution. Use the EAM122 interface module when connecting to this system. When this system is used, voltage levels must be adjusted simultaneously with VODIA, according to the below.
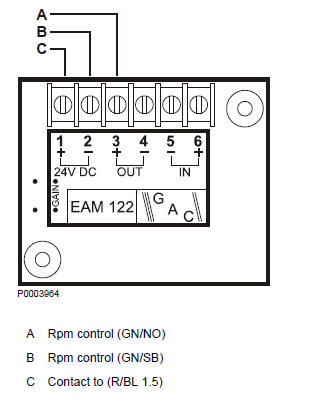
NOTICE! The EAM122 interface module is not sold by Volvo Penta. Contact a GAC (Governors of America Corporation) dealership.
Copyright © Guangxi Dingbo Generator Set Manufacturing Co., Ltd. All Rights Reserved | Sitemap
Update cookies preferences